
When you are dealing with initiatives, you might be required to manage the tasks list and track the timeline of the project. SharePoint Online is a great platform with plenty of features that can help you manage your project’s tasks more efficiently and make the task of project management a little less stressful.
One can leverage the Modern Sharepoint using the “Task App” for managing the tasks, and creating timelines. Refer to the post, Microsoft Tools for Project Management for more details about the Project Planner & to know about the Sharepoint Online features, check out All About SharePoint Online.
Let’s see the step-by-step procedure for this setup of classic tasks list in Modern Sharepoint.
We’ll work with is the Task List app. It has many great features for managing and keeping track of all your project tasks. Let’s see the features in the Sharepoint Teams site to manage the tasks.
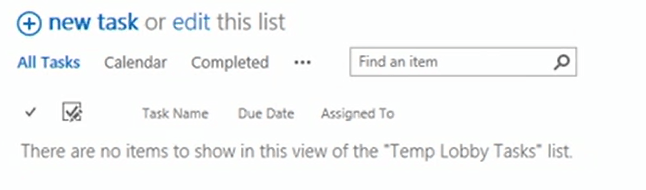
Step 1: Add the Tasks App under Site contents. Provide a name and description . To add the task list to the quick launch toolbar, enable the option in the list settings.

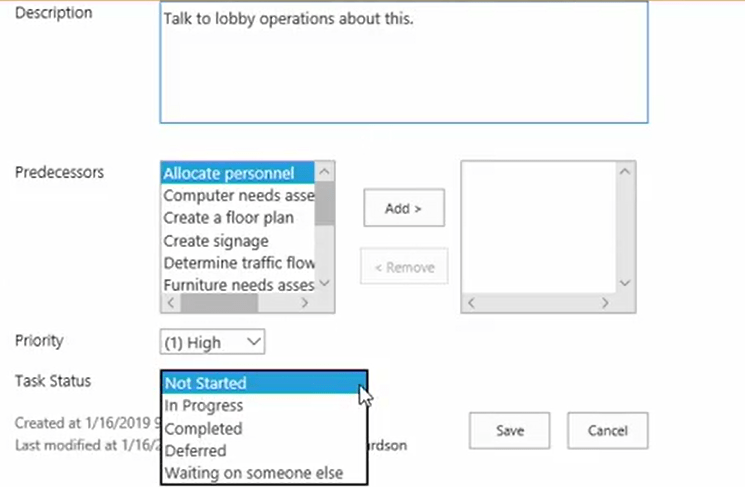
Step 2 – Method 1 – To add a tasks, click new task. Add a new task with all the details like Name, Start Date, Assigned To, Precedessor task, Priority, Task Status, etc.
Step 3 – Method 2 – Alternatively, you can add the task details from the Tasks Tab as shown below.

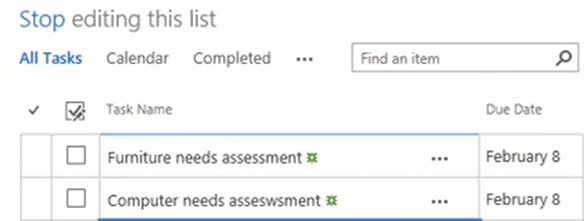
Step 4 – Method 3 – Or you can edit the list as shown below. It will be excel rows and columns where you can plug in the data.
Step 5 – Edit the tasks any time by clicking the Edit Item button on the Tasks Tab menu.
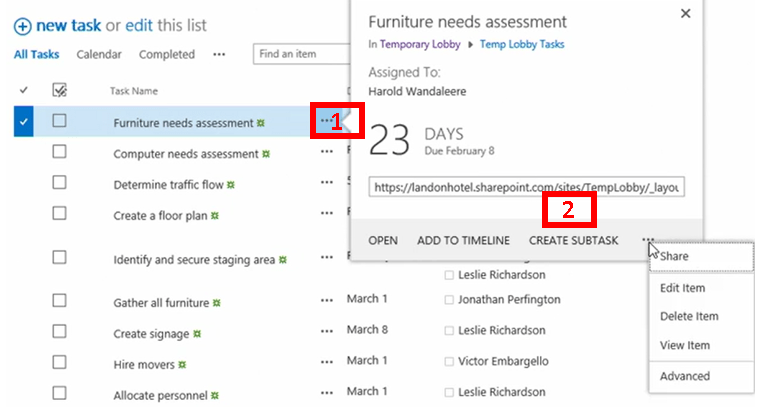
Step 6 – Add subtasks to the task by clicking on the three-dot eclipse as shown below.

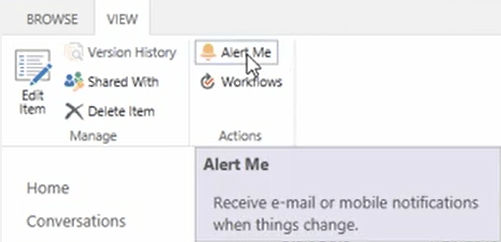
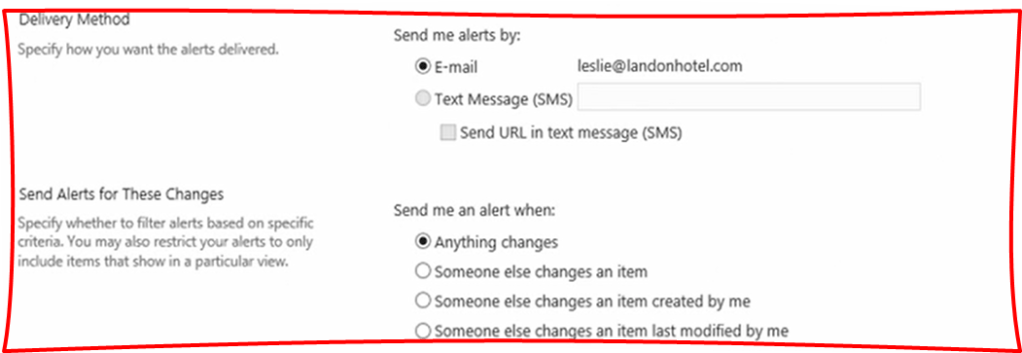
Step 7 – Task Alerts – Create an alert for any tasks by clicking on the tasks and click Alert Me.
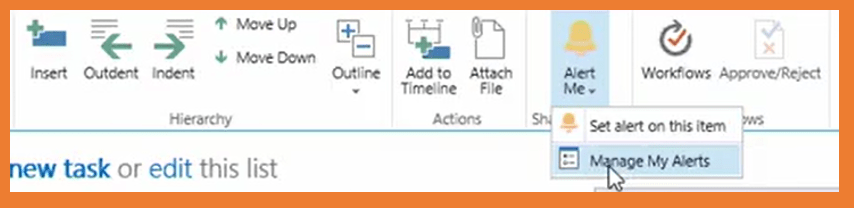
Step 8 – Manage your task alerts in a single frame. Under the Tasks menu, click Manage my Alerts.
Step 9 – Create an alert for the entire list. Manure under List menu and click Alert.

Step 10 – Add tasks to the timeline – Under the Tasks menu, click Add to timeline. If the task has a start and end date, it will be displayed as a bar. If the task has only the due date, it is considered a milestone and it is represented as Diamond Bar as a milestone.

Step 11 – Timeline Menu – When you click any tasks in the timeline, the below menu shows a lot of options to enable the timeline view. Note that, you will not get the option to add the task to the timeline.

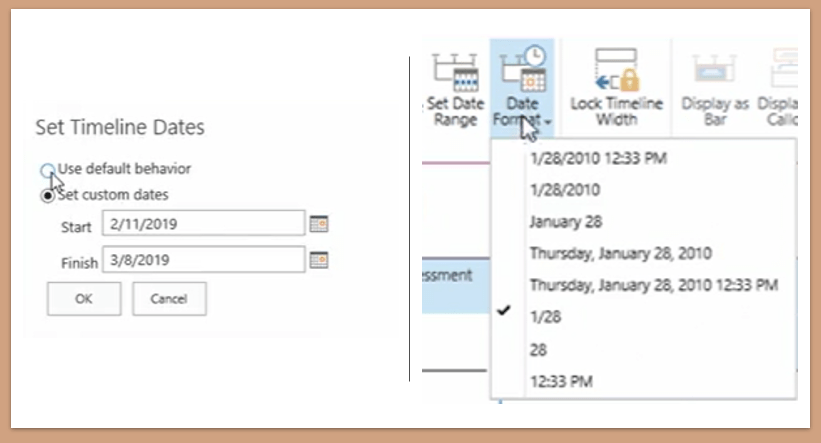
Step 12 – Below shows the date range and Date format menu options from the Timeline menu for ready reference.
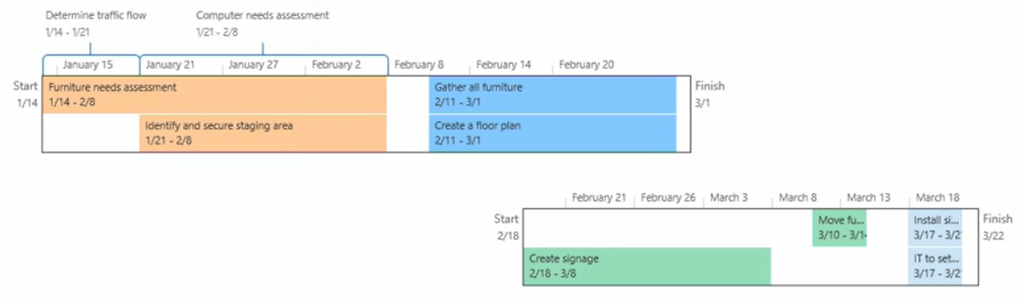
Step 13 – Below shows the tasks displayed either as Bar, Callout.

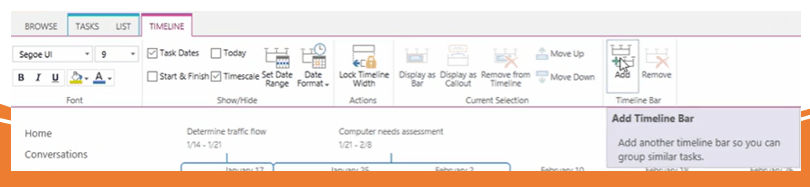
Step 14 – Add an additional timeline – Under the timeline menu, click the add timeline bar option as shown below. You can change the timeline date range for individual timelines.
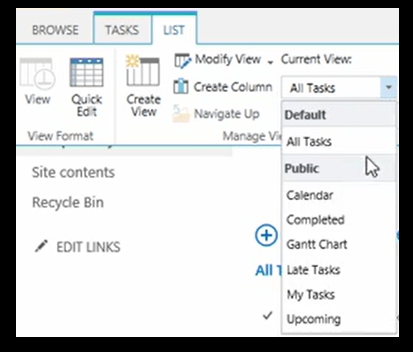
Step 15 – Several Views of the Task List – All these calendars, Completed, Gantt chart, Late Tasks, Upcoming tasks, My Tasks view etc are already created. You can also edit the views under List settings. Also an option to edit the default view – All Tasks as well. You can also create custom view by click the List tab of the ribbon, and in the Manage Views section, select the Create View button and choose the type of view you want to create.
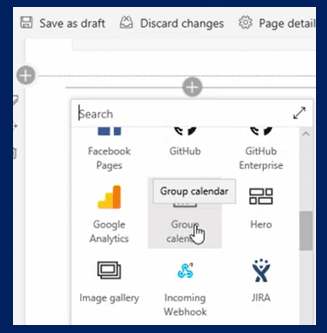
Step 16 – Group calendar – Access the team site calendar in Outlook and manually add the tasks or create a meeting with the team who has access to the team site. Simultaneously, we can add the calendar web part to the team’s site. Tasks are not connected to the Tasks list, so you must add them to the group calendar manually.
Hope you found the post informative. Your valuable feedback, question, or comments about this post are always welcome by leaving me a message on contact form is truly appreciated.
Discover more from LR Virtual Classroom
Subscribe to get the latest posts sent to your email.
