
If you haven’t used PowerPoint lately, you haven’t used Powerpoint. Technology is changing so fast, so with this latest update, PowerPoint is packed with a variety of different features that leverage artificial intelligence to help us work smarter and design and visualize our ideas faster. Lets see some of the key features which will make you present your presentation like a pro.
Power Tip -1
Morph Feature :

Morphing is like animation but very very easy. With just click of a button, you can create animations of images, shapes and text as well. Position and crop 3D models like a pro.
Power Tip -2
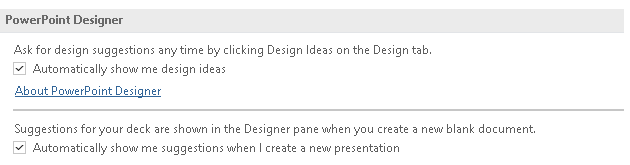
Turn on Microsoft PowerPoint Designer:
You can go up to Design tab and over here as shown below in this Designer group. One can click on the Design Ideas button and look at all the pretty designs. Now note that these suggestions are all powered by Microsoft’s AI, or Intelligent Services. This comes as part of teh Office 365 suite.

Power Tip -3
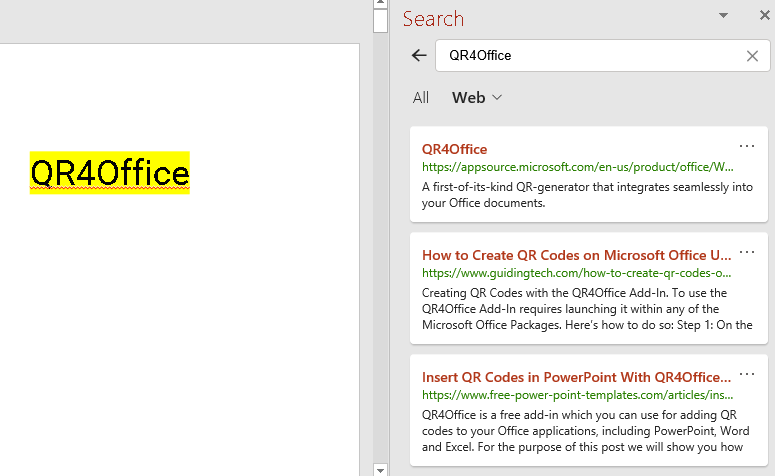
Lookup for anything – Smart Lookup / Search

Power Tip -4
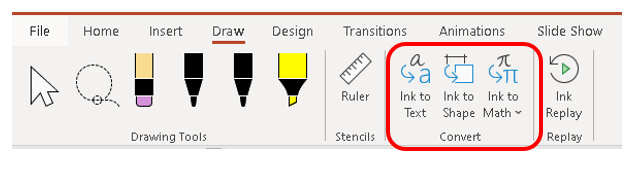
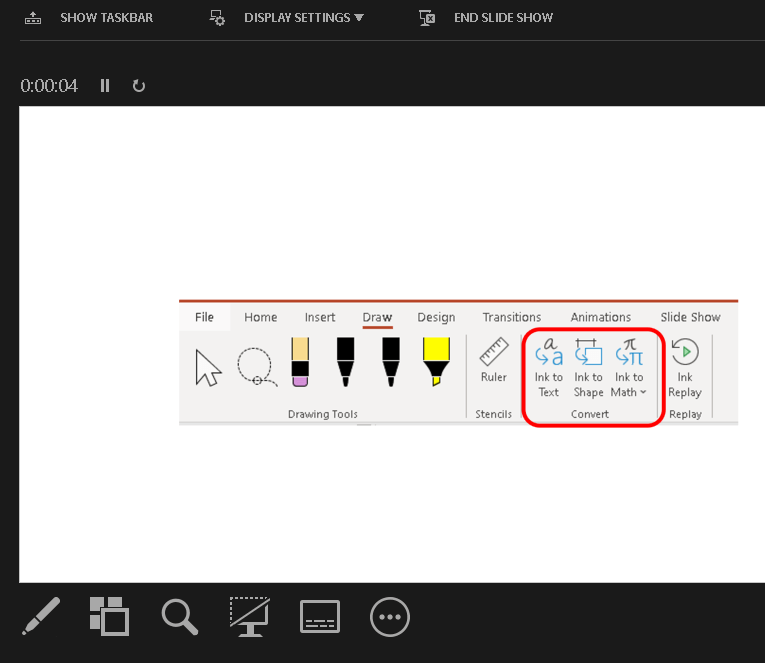
Drawing and inking with the Draw tab:

Power Tip – 5
Match colors with the Eyedropper tool:
Power Tip – 6
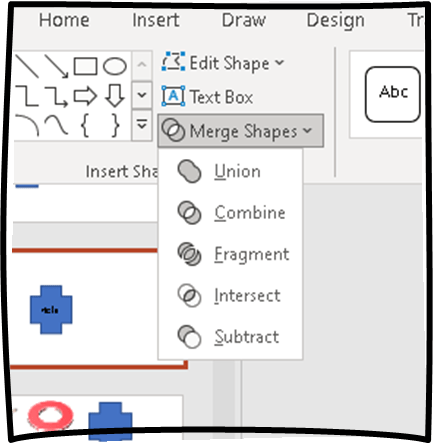
Merge shapes to create a custom shape:
Select Insert > Shapes. Once you insert two shapes, Press and hold Shift to select multiple shapes. The Shape Format tab appears. Select one of the merge shapes to see creative content.
Power Tip – 7
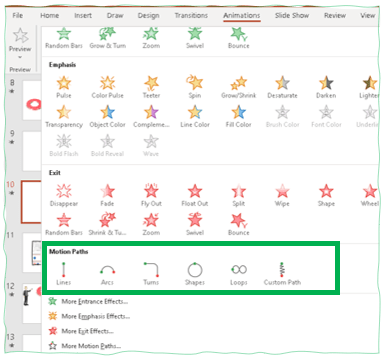
Create a custom animation:
Click the drop-down for Animations. There’s the categories for Entrances and Emphasis, Exit. Scroll down though, because hiding down at the bottom are motion paths. And there are some presets to choose from here. The one we want though is a Motion & Custom Path. A must use in your presentation for a jaw-drooping animation.
Power Tip – 8
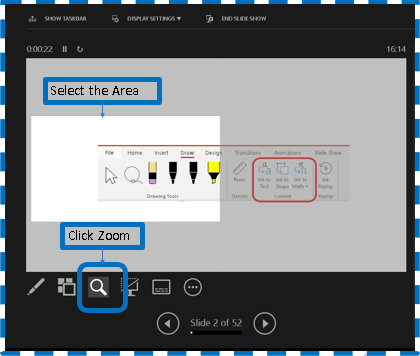
Zoom in to highlight slide details:
This little tip is for those of us who present with PowerPoint, that is to stand up in front of a crowd, maybe you have a presentation on your laptop that’s connected to a projector and your audience is looking at the big screen.
Zoom in to slide button ( as shown in Step 1) is the one that’s going to allow us to zoom in to specific areas.
As shown in the Step 2, select the area on which you are going to talk about. As we are talking, we just simply click and drag with the hand that is our mouse pointer. While we’re speaking. We’ll just press escape though to zoom back out and exit presenter view and continue with our presentation. That’s a handy little tip when you are presenting in front of people and you want them to focus on a specific area of your slide while you’re speaking.
Power Tip – 9
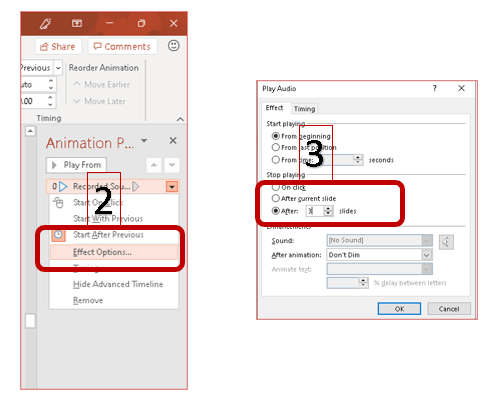
Play sounds across multiple slides:
One excellent way to make your presentations more interesting to your audience is to use audio. Audio could be your own narration, it could be sound effects , or how about music playing in the background.
Step 1 – Tick the Play across slides, Loop until stopped, No style & Play in background under Playback menu while selecting the audio record inserted in the slide.
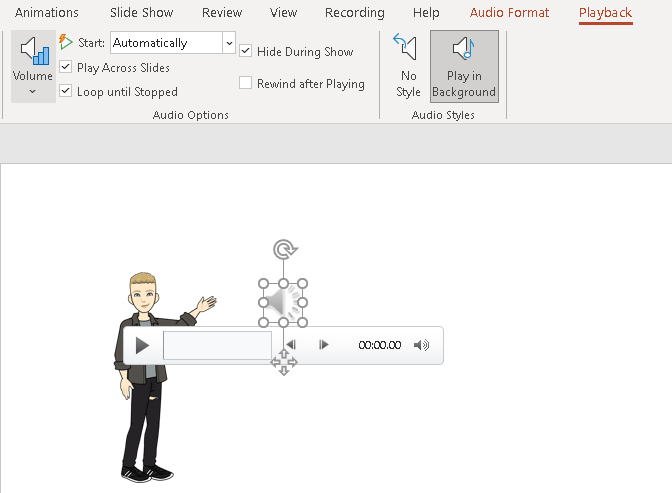
Step 2 – To stop laying the audio after certain number of slides, follow the Step 2 and 3 as shown below.
Power Tip – 10
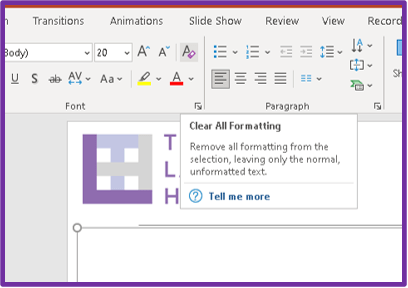
Clear All formatting:
Its very simple but most of the time, we are ignorant of this time-effective tool to change the formatting to match to the template theme you have in your presentation.
Power Tip – 11
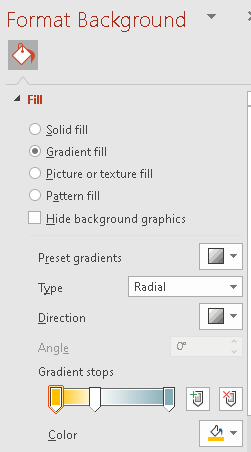
Create the perfect gradient:
Make sue of the Gradients feature in the Powerpoint to create attractive contents.

Power Tip – 12
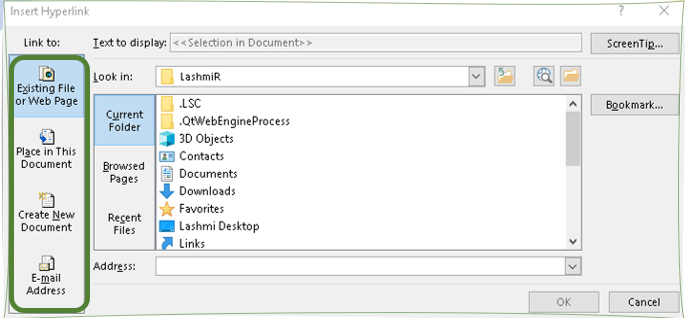
Add action buttons to a slide:
Use hyperlinked Action buttons as part of the slide during the presentation, so that it will make your content more interactivity. It can lead to other external website or another slide within the slide itself.
Power Tip – 13
Common Transitions to all slides:
Transition effects are those special effects that take you from one slide to the next. Typically, a good idea is to keep the same transition effect throughout your presentation so it doesn’t become too distracting and you want people paying attention to the content, not just the special effects.

Power Tip – 14
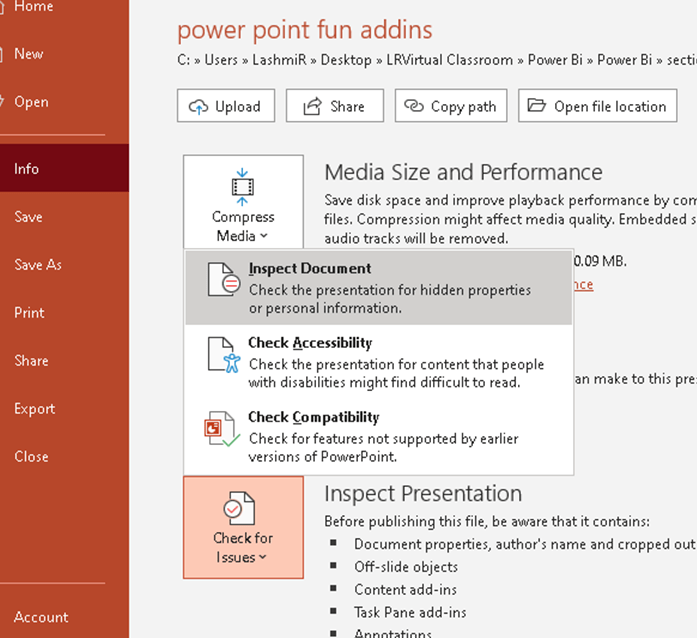
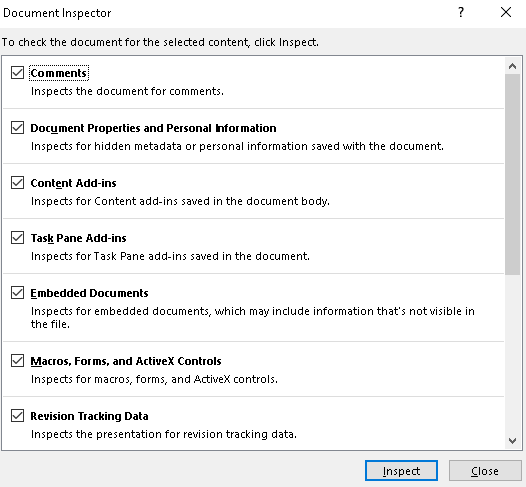
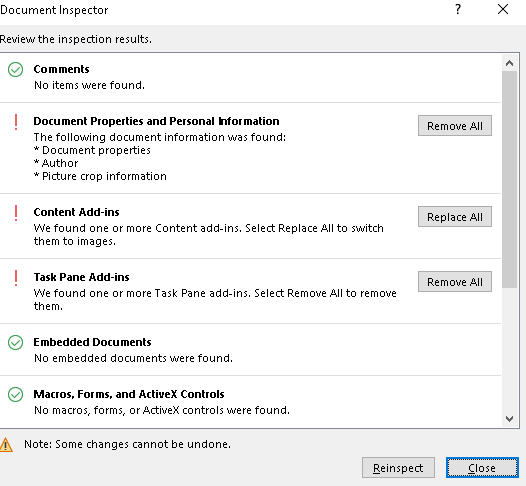
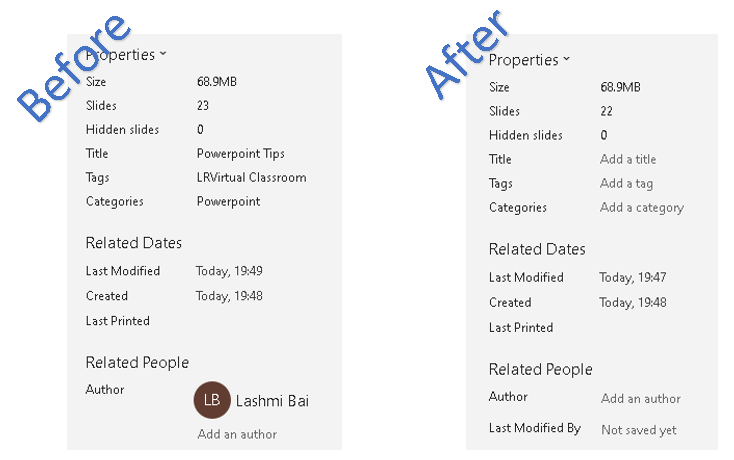
Remove proprietary metadata:
Do you want to hide the information about author name, create date, last modified date from your presentation, then follow these steps before sharing the file.
Power Tip – 15
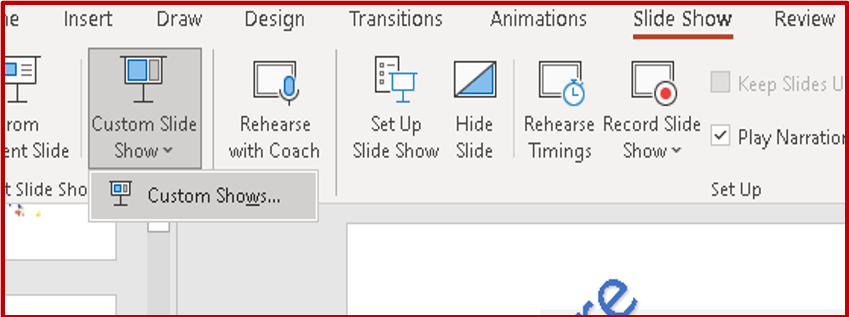
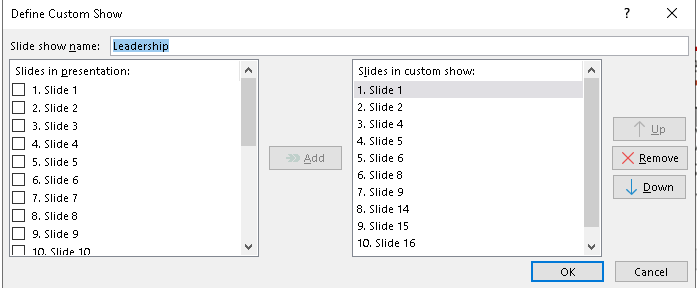
Create custom slideshows:
Have you ever created a presentation in PowerPoint, a number of slides that you wanted to present to a certain group of people? And then, you had to present to a different set of people, and you wanted to use some of the slides in that presentation, but maybe not show all of them. So you duplicate the presentation, delete the slides you don’t want, and now you have two different slide shows. It is so much time consuming right.
But, with the below custom slideshows method, you can create slideshow custom for the group.

Bonus Power Tip 1 :
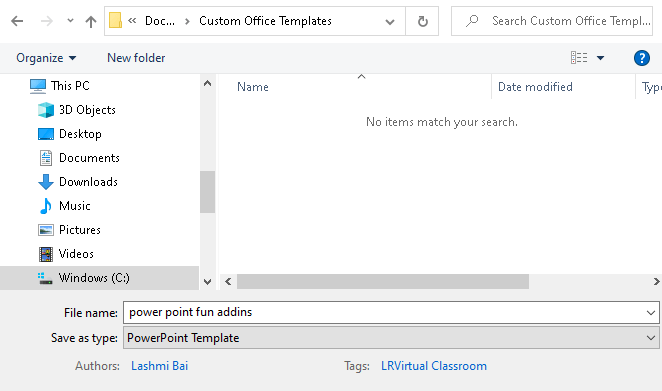
Save presentations as templates:
Have you ever created a presentation and maybe somebody else wants your presentation so they can create their own version of it?
Or Are you a person who works with multiple presentations and want to quickly open the presentation for future use?
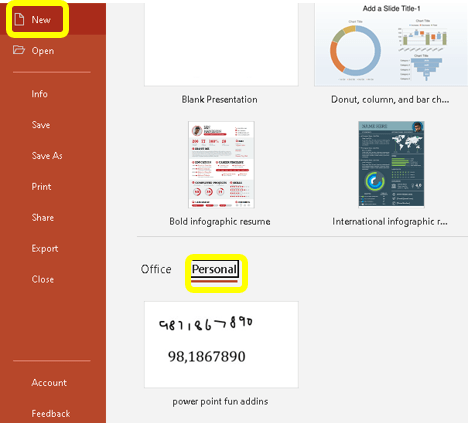
Then save the presentation as template. Once you save the presentation, you can open the slides again under New-> Personal-> Presentation Template
Bonus Power Tip 2 :
Blank you your screen during Presentation:
If you’re going to be having a discussion with your audience and you don’t want them actually staring up at the screen, looking at the slide content, you can temporarily blank it out. You can make it black by pressing the letter B, as in black, and then just hit any key to come back to your slide. How ’bout make it white instead? Try W. So whether you want it to be black or white, it’s up to you, B and W both work.
Bonus Power Tip 3 :
Quickly navigate to slide during Presentation:
If you want to pick a specific slide to go to try this, CTRL + S, as in slide, opens up this little dialogue where you can actually use your mouse if you wanted to or your cursor keys to go to a specific slide.
Bonus Power Tip 4 :
Use Pen or Laser pointer during slideshow:
Shortcut to have laser pointer is Ctrl + L
Shortcut to have pen is Ctrl + P
Hope you found the post informative. Your valuable feedback, question, or comments about this post are always welcome by leaving me message on contact form is truly appreciated.
Discover more from LR Virtual Classroom
Subscribe to get the latest posts sent to your email.
